Fur-Mounting System
We next needed a method of mounting the deer and fox furs so that they could be dyed and exposed in the test chamber. [See Part 1 of this series for an explanation on why we chose deer and fox furs.] Acquiring a series of meaningful color measurements from dyed fur demands a sample design that is more sophisticated than dye on quartz plate. The successful mounting system would secure a group of hairs at both ends, creating a flat sheet onto which the dye can be airbrushed. It must completely immobilize the hairs against handling, measurement, and the high rate of airflow inside the test chamber. Any loss or displacement of a dyed hair from the sample surface could be reflected as lost color in our measurements, indistinguishable from the dye fading that we are principally interested in.
In addition, the mounting system must:
- Be compatible with deer and fox hairs of average length
- Consistently distribute hairs across the sample to create a relatively planar surface
- Avoid hair breakage during sample construction, accelerated aging, or measurement
- Be made from materials that would not slump, melt, migrate, off-gas, or otherwise degrade during accelerated aging
- Produce samples of consistent size and shape that can be used with a jig to ensure measurements are repeatable
- Produce samples that can be handled without accidental disruption of hairs
- Produce samples that can be secured inside the test chamber
- Be simple and relatively quick to execute
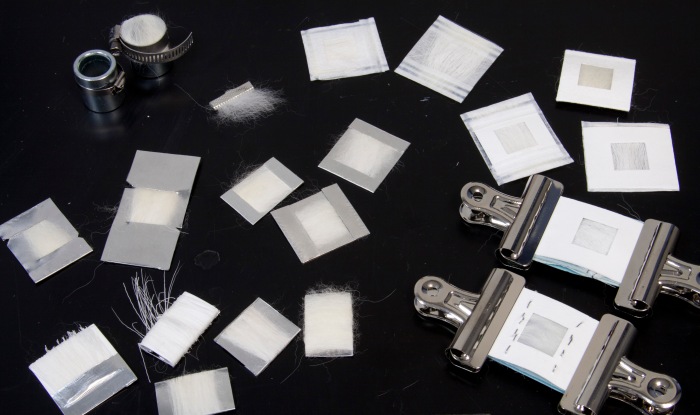
Early attempts at mounting hair for research samples that were unsuccessful. AMNH/J. Sybalsky
Our initial experiments cast a wide net. We looked at various types of clips, from binder and bulldog clips to staples and barrettes. These attachments were quick and simple to use, lacked components that would be likely to degrade, and could be adjusted to accommodate any fiber length. But we found that they produced samples that were bulky, insufficiently secure, incompatible with the measurement aperture of our spectrophotometer, or could not easily be standardized for use with a simple jig.


We explored other non-adhesive methods, employing flat materials that can be crimped or heat-sealed to trap hairs at both ends. We laid hairs on top of strips cut from nonwoven polyester and Mylar, folded the ends of each strip over the hairs, and sealed them in place. While these mounts created visually attractive, planar samples that could be made to fit into preexisting sample holders in our test chamber, the heat seal did not pinch the hairs well enough to fully immobilize them. A similar design using strips of aluminum sheet with crimped ends was more secure, with improved tightness and rigidity. They were, however, laborious to execute and would be challenging to standardize. A further adaptation using pieces of aluminum vapor-barrier tape in place of crimping made sample construction much easier, but introduced an organic adhesive. (See images above.)
Next, we looked into designs based on the concept of an embroidery hoop: we laid hairs across the open end of a cylindrical piece of steel hardware, then secured them in place using fasteners that could be wrapped and tightened around the cylinder. Stainless steel zip ties and hose clamps both held well in general, but fibers were loose around the locking mechanism in both cases. Execution was fussy, leaving fibers inconsistently distributed. (See images above.)
Fruitful discussions with several colleagues pointed us toward polyethylene sample holders designed for X-ray fluorescence (XRF) analysis of powdered samples. These holders usually consist of several separate components: a cylindrical tube or “cell,” a collar that snaps over the top of the cell, and a cap that covers the bottom end.
To mount the fur onto an XRF sample cup, a small piece is cut from the hide. The hair on the hide is brushed using an eyebrow comb to align the hairs parallel to one another. One end of the cylindrical cell is lined with Teflon sheet to act as a stable, white backing material during color measurements in case any gaps are left between hairs. The aligned hairs are carefully placed on top of the cell and immobilized by attaching the snap-on collar in a fashion similar to an embroidery hoop. Longer hairs extending from the side of the sample cup are trimmed using a scalpel. Any hairs standing proud of the sample surface and those not trapped by the sample ring are also trimmed away using scissors and tweezers.

XRF sample cup with Teflon sheet applied to the opening of the cell; the snap-on collar before applying. AMNH/F. Ritchie

Applying combed fox hair to the Teflon-covered end of the XRF sample cup. The snap-on collar is added after positioning the hair. AMNH/F. Ritchie

Completed fur cup samples AMNH/F. Ritchie
We found this method of sample construction to be labor-intensive, but it allowed us to make standardized samples more successfully than any other. Nevertheless, before committing ourselves to one method over the others, a trial run in the test chamber was in order. We subjected our two favorite mounting systems, the XRF sample cups and the aluminum sheet and barrier tape, to 600 hours of accelerated aging at 0.35 W/m2, 55% RH, 63ºC black panel temperature, and 48ºC chamber air temperature. Both systems held up to the environment and blowers well. There was no evidence of creep or adhesive migration in the aluminum mounts. In both systems, a few underfur fibers were stirred up above the sample surface by airflow inside the chamber, demonstrating the importance of early removal of fibers inclined to dislodge. This can be accomplished through application of gentle friction or canned air to the sample followed by cutting or tweezing away any loose hairs.
Because of the importance of producing samples of consistent size and shape, we ultimately adopted the mounting method based on the XRF sample cup. A selection of XRF sample cups with different dimensions and features was subsequently tested with our furs. Some were more compatible with the length of our fibers than others, and smaller cups gave us greater control over the distribution of fibers. Among the examples we tested, we felt that the Chemplex SpectroCertified Quality XRF Sample Cup No 3115 worked best.
In total, 300 sample cups were constructed (150 with fox, 150 with deer) and will be used for testing. Future blog posts will describe the testing methods and results.
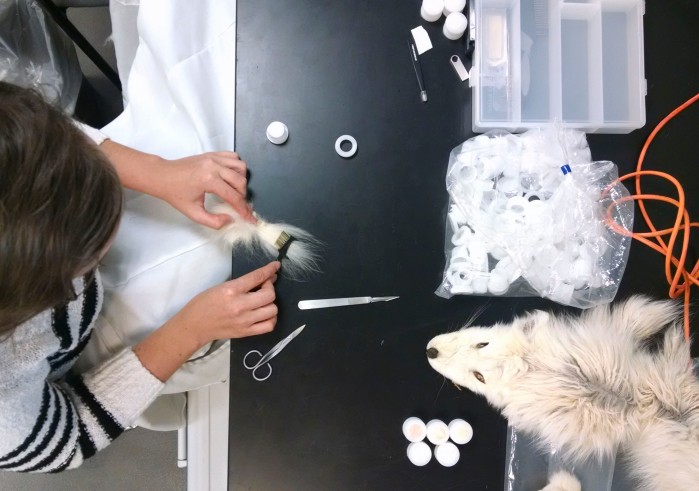
Project intern Caitlin Richeson preparing fur cup samples using fox hair. AMNH/F. Ritchie


So much work!! Very precise.
LikeLike